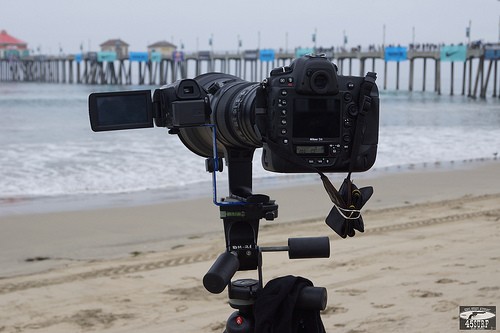
Modern cameras can be covered in
buttons and dials, which can be daunting to new photographers. But
understanding what these controls are, and what they do, is important if
you want to up your photographic game. Here we look at what's what on
your new camera, from the shutter-release button to the tripod socket.
While this is not intended to be
a conclusive guide to your specific camera (the often overlooked user
manual is still better for that), we hope this guide will help you
identify some of the parts of you cameras you'll need to be familiar
with to improve your photography.
All cameras are different and
can have various combinations of controls and layouts, so there's a very
good chance your camera won't look exactly like the
Nikon D800 and the
Canon EOS M3
cameras here. While these cameras may have a certain button on the
back, yours may feature it on the top, on the front, or not at all.
While in our examples the DSLR
has more physical controls than the mirrorless camera, this is not
always the case. For example a mirrorless camera like the
Olympus OM-D E-M1 has more controls than the
Canon EOS 1300D DSLR. It's more often about the level of camera, whether it's aimed at
beginners or
enthusiasts, rather than
camera type.
@ Front
1. Shutter-release button - This
is the button you hit when you want to take a photo. Pressing it
halfway will generally activate autofocus first.
-ប៊ូតុង Shutter-release: សម្រាប់ចុចថតរូប ហើយប្រសិនបើអ្នកចុចបានពាក់កណ្ដាលវានឹងធ្វើការ Autofocus មុនថត។
2. Front dial - A front-facing
dial is predominantly used for changing aperture or shutter speed,
though it can also be used to make all sorts of other adjustments.
-
Dial ខាងមុខ: ប្រើសម្រាប់ផ្លាស់ប្ដូរ Aperture ឬ Shutter speed ព្រមទាំងបង្កើតនូវ Adjustments ផ្សេងទៀតផងដែរ។
3. Custom / Function button -
While these buttons normally come assigned to a specific camera setting,
they can be adjusted depending on what setting you use most.
-
ប៊ូតុង Custom / Function: ប្រើសម្រាប់កំណត់ Setting ដែលអ្នកនិយមប្រើបំផុត (កំណត់ដោយខ្លួនឯង)។
4. Power switch - Used (unsurprisingly) to turn your camera on or off.
-
Power switch: ប្រើសម្រាប់បិទ ឬបើកកាមេរ៉ា។
5. Lens mount - This metal ring
is where the lens (assuming you are using an interchangeable lens
camera) attaches to the camera body. After lining up the dots you twist a
lens to mount it.
-
Lens mount: ប្រើសម្រាប់ភ្ជាប់ Lens នឹងកាមេរ៉ា។


6. Lens release button - When
you want to change lenses you need to press this lens release button and
then twist the lens to opposite way (to when you mounted it) to remove
it.
-
ប៊ូតុង Lens release: ប្រើសម្រាប់ដោះ Lens ចេញពីតួកាមេរ៉ា។ អ្នកត្រូវចុចប៊ូតុងនេះមុនពេលមួលដោះ Lens។
7. Mirror / Sensor - If you're
looking at a DSLR without a lens mounted you'll see the mirror which
lets you use the viewfinder to see through the lens. Behind this is the
image sensor, which you'll see on a mirrorless camera as it lacks the
mirror.
-
Mirror / Sensor: ប្រសិនបើពិនិត្យមើលលើកាមេរ៉ា DSLR ដែលគ្មានភ្ជាប់ Lens អ្នកនឹងឃើញកញ្ចក់ដែលប្រើប្រាស់ Viewfinder ក្នុងការមើលតាមរយៈ Lens។ នៅខាងក្រោយវាជា Image sensor ដែលអ្នកនឹងឃើញវាលើកាមេរ៉ា Mirrorless ព្រោះវាគ្មានកញ្ចក់នោះទេ។
@Top
1. Additional dials - While most
interchangeable lens cameras feature a mode dial (see 6) many have
additional dials which can control things like shutter speed, ISO, or
release mode.
-
Dials បន្ថែម: លើកាមេរ៉ាអាចប្ដូរ Lens បាន ដែលមាននូវមុខងារ Mode Dials ជាច្រើនមាន Dials បន្ថែមសម្រាប់គ្រប់គ្រងលើ Shutter speed, ISO, ឬ Release mode។
2. ISO - Up there with aperture
and shutter speed, ISO is one of the settings you will want to adjust
most frequently, so you'll want to know where this is.
-
ISO: ប្រើសម្រាប់កំណត់ ISO។
3. Hot-shoe - Even if your
camera has a pop-up or built-in flash, a hot-shoe lets you connect an
external flash, or mount other accessories.
-
Hot-shoe: ប្រើសម្រាប់ភ្ជាប់ External flash ឬ Accessories ផ្សេងទៀត។
4. Pop-up flash - Many cameras
feature a pop-up flash. While not as versatile or strong as many
external ones, it can still be useful in a number of situations.
-
Pop-up flash: សម្រាប់បញ្ចេញ Flash ពេលតម្រូវពន្លឺបន្ថែម ឬអាចកំណត់បាន។
5. Sensor marker - This little icon shows the focal plane marker of the image sensor.
-
Sensor marker: សម្រាប់បង្ហាញនូវ Focal plane marker នៃ Image sensor។
6. Mode button / dial -
Depending on your camera, this is used to switch your camera into modes
such as Auto, Program, Shutter priority, Aperture priority and Manual.
Some cameras also include scene modes and video recording on the mode
dial.
-
ប៊ូតុង Mode/ Dial: វាអាស្រ័យលើកាមេរ៉ាដែលប្រើសម្រាប់ផ្លាស់ប្ដូរកាមេរ៉ា Mode ដូចជា Auto, Program, Shutter priority, Aperture priority និង Manual។ កាមេរ៉ាមួយចំនួនក៏មាន scene mode និងមុខងារថតវីដេអូលើ Mode dial ផងដែរ។


7.Shutter button - This is the
button you hit when you want to take a photo. Pressing it halfway will
generally activate autofocus first.
-
ប៊ូតុង Shutter: សម្រាប់ចុចថតរូប ហើយប្រសិនបើអ្នកចុចបានពាក់កណ្ដាលវានឹងធ្វើការ Autofocus មុនថត។
8. Power switch - Used (unsurprisingly) to turn your camera on or off.
-
Power switch: ប្រើសម្រាប់បិទ ឬបើកកាមេរ៉ា។
9. Exposure compensation - This
can be a dedicated dial, or a button which is used with a separate
dial, and is used to set different exposure values to those selected by
the camera.
-
Exposure compensation: ប្រើសម្រាប់កំណត់តម្លៃ Exposures ផ្សេងគ្នាទៅនឹងមុខងារដែលបានជ្រើសរើសលើកាមេរ៉ា។
10. Video record button - Many
cameras feature a dedicated button to start and stop video recording,
though some use the shutter button when the device is set to video.
-
ប៊ូតុងថតវីដេអូ: កាមេរ៉ាជាច្រើនប្រើប៊ូតុងពីរសម្រាប់ Start និង Stop ថតវីដេអូ ហើយខ្លះទៀតប្រើប៊ូតុង Shutter តែម្ដងនៅពេល Device កំណត់ការថតជាវីដេអូ។
11. Top LCD display - An LCD
screen on the top of the camera can let you quickly check on cameras
settings without having to use the rear screen.
-អេក្រង់ LCD ខាងលើ: អ្នកអាចត្រួតពិនិត្យនូវកាមេរ៉ា settings លើអេក្រង់បាន។
12. Control dial - This dial is
predominantly used for changing aperture or shutter speed, though it can
be used to make other adjustments.
-
Control dial: ប្រើសម្រាប់ផ្លាស់ប្ដូរ Aperture ឬ Shutter speed ព្រមទាំងបង្កើតនូវ Adjustments ផ្សេងទៀតផងដែរ។
13. Custom / Function button -
While custom or function buttons normally come assigned to a specific
camera setting, they can be adjusted depending on what setting you use
most.
-
ប៊ូតុង Custom / Function: ប្រើសម្រាប់កំណត់នូវ Setting ដែលអ្នកនិយមប្រើបំផុត (កំណត់ដោយខ្លួនឯង)។
@ Back
1. Play (and delete) buttons - For reviewing and deleting images or videos you've shot.
-
ប៊ូតុង Play និង Delete: ប្រើសម្រាប់ពិនិត្យមើលរូបភាព និងលុបរូបភាព ឬវីដេអូ ដែលអ្នកបានថតរួច។
2. Menu button - Most digital cameras have a vast array of settings which you will access using the menu button.
- ប៊ូតុង Menu: ប្រើសម្រាប់មើល Settings នានាលើកាមេរ៉ា។
3. Playback controls - When
reviewing images you've shot, you can zoom in to check detail, or view
as a grid. Some cameras let you do this using a touchscreen with
gestures we've all become familiar with on smartphones.
- Playback controls: ប្រើសម្រាប់ពិនិត្យមើលភាពលំអិតនៃរូបភាពដែលបានថតរួច ដែលអ្នកអាច Zoom ឬបង្ហាញជា Grid បាន។
4. Monitor / Touchscreen - The
rear monitor can be used for composing shots, reviewing images and
navigating menus. More and more cameras are beginning to feature
touchscreens.
- Monitor / Touchscreen: Rear monitor ប្រើសម្រាប់រៀបចំការថត ពិនិត្យមើលរូបភាព និងរំកិល Menus។ កាមេរ៉ាជាច្រើនបានប្រើប្រាស់ Touchscreen ដែលកាន់តែងាយស្រួលក្នុងការគ្រប់គ្រង។
5. Viewfinder / EVF - DSLRs
feature traditional optical viewfinders, while mirrorless and compact
cameras can feature electronic viewfinders which let you see the impact
of changing settings as you shoot. Some cameras don't have a viewfinder
at all.
- Viewfinder / EVF: កាមេរ៉ា DSLRs មានមុខងារ traditional optical viewfinders ខណៈកាមេរ៉ា Mirrorless និង Compact មានមុខងារ Electronic viewfinders ដែលអ្នកអាចឃើញពីលក្ខណៈរូបភាពពេលផ្លាស់ប្ដូរ Settings សម្រាប់ថត។ កាមេរ៉ាមួយចំនួនមិនមាន Viewfinder នោះទេ។
6. Lock buttons - These buttons are used to lock settings such as exposure, aperture, shutter speed and focus when held down.
-
ប៊ូតុង Lock: ប្រើសម្រាប់ Lock settings ដូចជា Exposure, Aperture, Shutter speed និង Focus។
7. Control dials - These dials
are used for altering key camera settings and can take the form of
horizontal wheels, vertical rotating discs or rocker buttons.
-Control Dials: ប្រើសម្រាប់ផ្លាស់ប្ដូរ key settings លើកាមេរ៉ាដោយមួលរំកិលវា។
8. Menu controls - Used for navigating menus. These buttons can also have additional functions when used while not in a menu.
-
Menu controls: ប្រើសម្រាប់រំកិល Menus។
9. Live View / Video - Many
DSLRs have a button to activate Live View and select video recording.
Mirrorless cameras are more likely to just have a video record button.

-
Live View / Video: កាមេរ៉ា DSLRs ជាច្រើនមានប៊ូតុងដើម្បី Live View និងជ្រើសរើសថតវីដេអូ ប៉ុន្តែកាមេរ៉ា Mirrorless មានតែប៊ូតុងថតវីដេអូប៉ុណ្ណោះ។
10. Info - This button can be
used to display camera settings on the rear monitor, or access
additional information, and on some cameras guide modes.
-
Info: ប្រើសម្រាប់បង្ហាញនូវព័ត៌មានបន្ថែម និងការណែនាំផ្សេងអំពី Modes។
@Left Side
1. Pop-up flash release - Pressing this button will force the flash to pop-up.
-
Pop-up Flash release: ប្រើសម្រាប់បញ្ចេញ Flash។
2. Auto focus controls - Some cameras feature dedicated buttons which can be used to cycle through autofocus modes and settings.
- Auto focus controls: កាមេរ៉ាមួយចំនួនមានប៊ូតុង ដែលអាចផ្លាស់ប្ដូរ Autofocus modes និង Settings។
3. Microphone socket - While
your camera has a built-in microphone, you will get better audio
quality using an external microphone, if possible.
- Microphone socket: ប្រើសម្រាប់ភ្ជាប់ External microphone ដើម្បីបង្កើនគុណភាពសំឡេង។
4. USB - For connecting the camera to a computer or other devices.
-
USB: ប្រើសម្រាប់ភ្ជាប់កាមេរ៉ាទៅនឹងកុំព្យូទ័រ ឬឧបករណ៍ផ្សេងទៀត។
5. Headphone socket - Listening
to audio while recording video will let you manage levels better, if
your camera has a headphone socket.
-
Headphone socket: អ្នកអាចស្ដាប់សំឡេងកំឡុងពេលថតវីដេអូ ដែលអ្នកអាចគ្រប់គ្រងលើកម្រិតវាបានល្អ។


6. HDMI - The HDMI port lets you
playback photos and video straight to a TV, or (depending on the
camera) record video to an external device.
-
HDMI: ប្រើសម្រាប់បង្ហាញ រូបភាព ឬវីដេអូលើទូរទស្សន៍ ឬ External Display តាមរយៈ HDMI port។
@ Right Side
1. Memory card - Your camera
will shoot images to one or two memory cards, which could be any number
of types (SD, CompactFlash, CFast 2 and XQD being the most common).
- Memory card: ប្រើសម្រាប់ដាក់មេម៉ូរីកាតអាចបានមួយ ឬពីរដែលអាចមានប្រភេទ SD, CompactFlash, Cfast 2 និង XQD។
2. HDMI - The HDMI port lets you
playback photos and video straight to a TV, or (depending on the
camera) record video to an external device.
- HDMI: ប្រើសម្រាប់បង្ហាញ រូបភាព ឬវីដេអូលើទូរទស្សន៍ ឬ External Display តាមរយៈ HDMI port។
@ Bottom
1. Battery - Most dedicated cameras have removable batteries, meaning you can swap them over when one runs out.
-
Battery: ប្រើសម្រាប់ផ្លាស់ប្ដូរថ្ម។
2. Bottom Terminal - This can come in handy if you want to use your camera with a vertical grip.
-
Bottom Terminal: វាអាចងាយស្រួលប្រើ ប្រសិនបើអ្នកចង់ប្រើកាមេរ៉ាជាមួយ Vertical grip។
3. Tripod socket - Almost all cameras feature a standard thread, allowing you to use them with any tripod.
- Tripod socket: ប្រើសម្រាប់ភ្ជាប់ជើងទម្រ Tripod។
4. Memory card - Your camera
will shoot images to one or two memory cards, which could be any number
of types (SD, CompactFlash, CFast 2 and XQD being the most common).
-
Memory card: ប្រើសម្រាប់ដាក់មេម៉ូរីកាតអាចបានមួយ ឬពីរដែលអាចមានប្រភេទ SD, CompactFlash, Cfast 2 និង XQD។
@Lenses
1. Lens mount and contacts -
This is the part of the lens which connects with the camera body. The
contact pins are how your camera and lens communicate.
-
Lens mount និង contacts: ជាផ្នែករបស់ Lens ដែលភ្ជាប់នឹងតួកាមេរ៉ា។ Contact pins ជាចំណុចដែលកាមេរ៉ាអាចភ្ជាប់នឹង Lens។
2. Lens alignment dot - When you are attaching a lens, you line up the dots on the camera and lens.
-
Lens alignment dot: ពេលអ្នកភ្ជាប់ Lens អ្នកត្រូវដាក់ឲ្យចំគន្លាក់របស់កាមេរ៉ា និង Lens។
3. Focal length / focus settings
- These markers let you check on focal length and focus distance
settings by looking at the lens.
-
Focal length / focus settings: ប្រើសម្រាប់ពិនិត្យមើល Focal length និងចម្ងាយ Focus settings តាមរយៈ Lens។
4. Focus ring - While you might
use autofocus most of the time, turning the focus ring will let you take
control manually. On some cameras you'll need to first turn on manual
focus mode.
-
Focus ring: អ្នកអាចមួលរំកិលរង្វង់ Focus
លើ Lens សម្រាប់កំណត់ការ Focus ដោយខ្លួនឯង
ខណៈកាមេរ៉ាខ្លះអ្នកត្រូវប្រើ Manual focus mode ជាមុនសិន។
5. Filter thread - The front of
the lens is where you can attach any filters you might need. These comes
in different sizes depending on the lens.
-
Filter thread: ខាងមុខ Lens អ្នកអាចភ្ជាប់នឹង Filters ដែលអាស្រ័យលើទំហំរបស់ Lens។
6. Manual / autofocus control - To focus manually, you sometimes have to flick a switch on the lens and on the camera.
Manual / autofocus control: សម្រាប់ផ្លាស់ប្ដូរការ Focus ដោយពេលខ្លះអ្នកអាចផ្លាស់ប្ដូរលើ Lens ឬលើកាមេរ៉ា។
7. Image stabilization - Lenses
with optical image stabilization can have a switches to turn it on or
off, and even switch between stabilization modes.


-
Image stabilization: Lens ដែលមាន OIS (optical image stabilization) អាចធ្វើការផ្លាស់ប្ដូរដោយបិទ ឬបើកបាន។
8. Lens name and details - This
will often tell you everything you need to know about a lens, including
its focal length range, aperture, and what other technologies it
includes.
-
ឈ្មោះ Lens និងព័ត៌មានលំអិត: បង្ហាញពីអ្វីដែលអ្នកត្រូវដឹងពី Lens រួមមាន Focal length range, Aperture, និងបច្ចេកវិទ្យាផ្សេងទៀតដែលមាន។
9. Zoom ring - Turning this ring
will change the focal length of zoom lenses, letting you zoom in or
out. Obviously prime lenses don't feature a zoom ring.
-
Zoom ring: មួលរង្វង់នេះដើម្បីផ្លាស់ប្ដូរ Focal length នៃ Zoom Lenses ដែលអាច Zoom in ឬ out តែចំពោះ Prime Lenses មិនមានមុខងារ zoom ring៕