១) Shortcut សម្រាប់ការប្រើប្រាស់មុខងារ Windows 10 Virtual Desktop
Windows Key + Ctrl + D សម្រាប់បង្កើត Virtual Desktop ថ្មីមួយ ហើយនឹងលោតទៅ Desktop ថ្មីនោះតែម្ដង
Windows Key + Tap បើក Task View ដើម្បីបង្ហាញចេញ Virtual Desktops
ទាំងអស់ដែលមាន។ វានឹងមានឈ្មោះសម្គាល់ដោយ Desktop 1, Desktop 2, …
បន្ទាប់មកអ្នកអាចចុចចូលទៅផ្ទាំងការងារបង្កើតថ្មីណាមួយទាំងនោះបាន។
Windows Key + Ctrl + Left Arrow ផ្លាស់ប្ដូរ ឬរំកិលផ្ទាំង Virtual Desktop ពីស្ដាំទៅឆ្វេង
Windows Key + Ctrl + Right Arrow ផ្លាស់ប្ដូរ ឬរំកិលផ្ទាំង Virtual Desktop ពីឆ្វេងទៅស្ដាំ
Windows Key + Ctrl + F4 បិទ Virtual Desktop ដែលអ្នកកំពុងបើក
២) Shortcut សម្រាប់ការប្រើប្រាស់ Command Prompt នៅលើ Windows 10
Ctrl + Shift + Home សម្រាប់ប្ដូរ Cursor ពីចំណុចចាប់ផ្ដើមនៃ
បញ្ជាដែលបានបញ្ចូលរបស់ Command Prompt ហើយនិង Select
ពាក្យបញ្ជាទាំងនោះចាប់ពីចំណុចចាប់ផ្ដើមមកត្រឹម Cursor។
Ctrl + Shift + End ប្ដូរទីតាំង Cursor
ទៅចំណុចចុងក្រោយនៃពាក្យបញ្ជាដែលបានបញ្ចូលនៅលើ Command Prompt
ជាមួយការ Select ទាំងអស់ចាប់ពីចំណុចចាប់ផ្ដើម
ដល់បញ្ចប់នៃពាក្យបញ្ជា។
Ctrl + Up ដើម្បីទាញយកពាក្យបញ្ជាចាស់ ពី History របស់ Command Prompt បន្ទាប់ពីពាក្យបញ្ជាចុងក្រោយមកបញ្ចូល
Ctrl + Down ដើម្បី Move ឃ្លាបញ្ជាមួយបន្ទាត់ ពី History របស់ Command Prompt ចុះក្រោម។
Ctrl + M សម្រាប់ បញ្ចូលស្នាមសម្គាល់ “mark mode” ដែលអាចឱ្យអ្នក select លើអក្សរបាន
Ctrl + F ដើម្បីបើកប្រអប់ Find ក្នុងការស្វែងរកនូវពាក្យបញ្ជាជាក់លាក់ នៅក្នុង លទ្ធផលបង្ហាញចេញរបស់ Command Prompt
Ctrl + C សម្រាប់ Copy នូវ បន្ទាត់នៃពាក្យបញ្ជាដែលបាន Select
Ctrl + X ដើម្បី Cut នូវពាក្យដែលបាន Select
Ctrl + V ប្រើសម្រាប់ Paste នូវអ្វីដែលអ្នកបាន Copy ឬ Cut
Alt + F4 ដើម្បីបិទផ្ទាំង Command Prompt
៣) ប្រើមុខងារ Aero Snap desktop windows ដើម្បីងាយស្រួលញែកផ្ទាំង Windows សម្រាប់ការងារផ្សេងៗ
ឧទាហរណ៍ អ្នកកំពុងឈរលើផ្ទាំង Windows Explorer,... Windows Key + Left Arrow ដើម្បីចែកផ្ទាំង Windows ក្នុងទំហំពាក់កណ្ដាលពេញទៅឆ្វេង Windows Key + Right Arrow ដើម្បីចែកផ្ទាំង Windows ក្នុងទំហំពាក់កណ្ដាលទៅស្ដាំ Windows Key + Up Arrow សម្រាប់ធ្វើឱ្យផ្ទាំងកិច្ចការមានទំហំពេញ Full Screen Windows Key + Down Arrow សម្រាប់ Minimize ពោលគឺលាក់ផ្ទាំង Windows Explorer បាត់។
៤) Shortcut សម្រាប់ប្រើប្រាស់ផ្លូវកាត់ផ្សេងៗនៅលើ Windows 10
ស្នៀតប្រើ Windows 10 យ៉ាងពិសេស និងសម្ងាត់បំផុត កម្រមានអ្នកដឹង ដែលអ្នកអាចចាប់ផ្ដើមស្វែងយល់ពេលនេះ
ប្រព័ន្ធប្រតិបត្តិការ Windows OS របស់ Microsoft
គឺបានបញ្ចូលនូវមុខងារជាច្រើន មកជាមួយ ដែលអ្នកប្រើអាចស្វែងយល់
និងប្រើប្រាស់ទៅតាមតម្រូវការរៀងៗខ្លួន។ ហើយទំព័រនេះដែរ
យើងនឹងលើកយកគន្លឹះល្អ ចំនួន ១០ផ្សេងទៀត
ដែលនឹងជួយអ្នកទទួលបានបទពិសោធន៍ខ្ពស់
ក្នុងការប្រើប្រព័ន្ធសូហ្វ៊េរចុងក្រោយ Wisndows 10 ដែលយ៉ាងហោច
ក៏មានប៉ុន្មានចំណុចដែរ ដែលអ្នកមិនទាន់ដឹង។
ទស្សនាវដ្ដី PCMag បានធ្វើការលើកយកគន្លឹះ ពិសេសទាំងនេះ
សម្រាប់អ្នកដែលជាហ្វេន (fan) ប្រព័ន្ធប្រតិបត្តិការ Windows
ដូច្នេះប្រិយមិត្ត អាចស្វែងយល់ ដើម្បីទទួលបានចំណេះដឹងថ្មីៗ
បន្ថែមនៅលើ Windows 10 បាន។
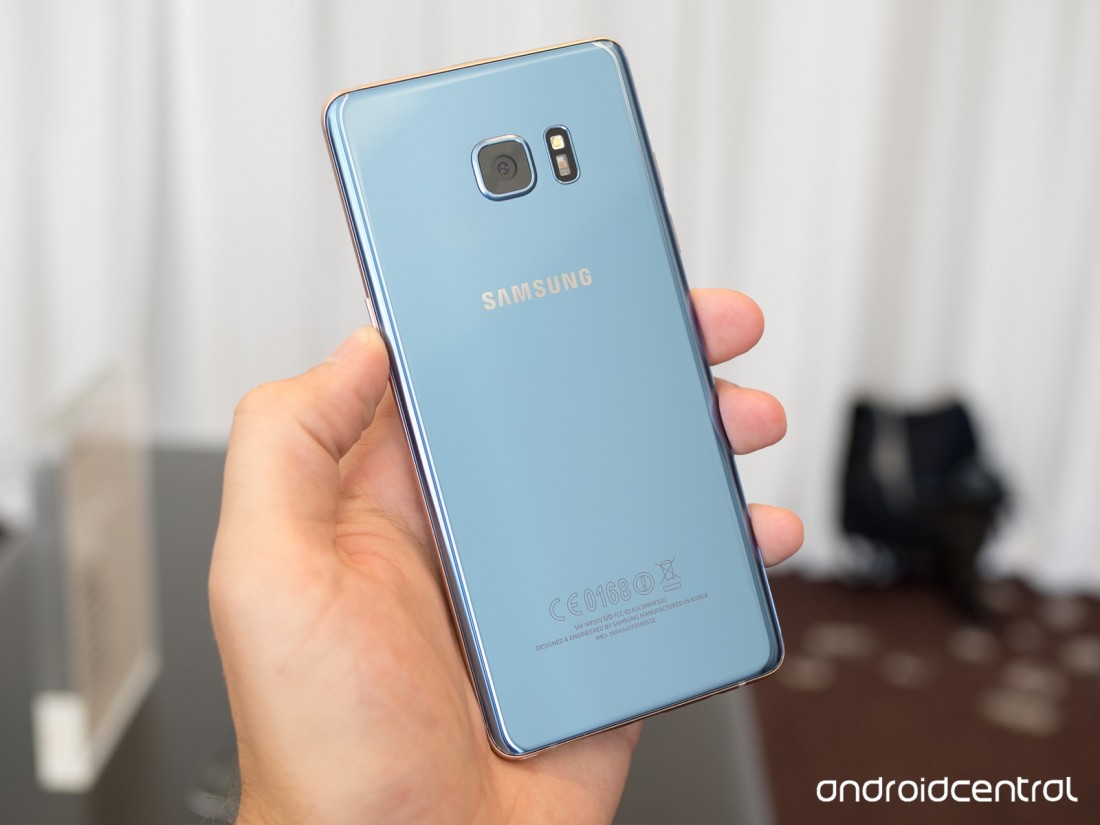
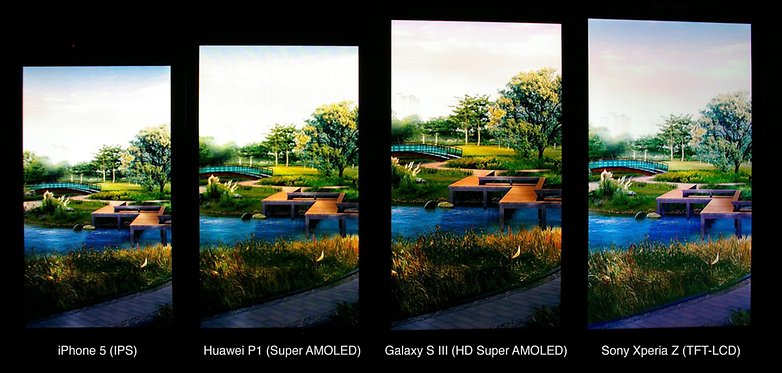
Full HD
ជាកម្រិតបន្ទាប់ដែលបច្ចុប្បន្នជាស្តង់ដារសម្រាប់អេក្រង់ស្មាតហ្វូន
។ Full HD មានទំហំខ្នាត 1920 x 1080 pixels ហើយចំនួនដង់ស៊ីតេ
Pixel នឹងអាស្រ័យលើទំហំធំរបស់អេក្រង់។ សម្រាប់
ស្មាតហ្វូនទំហំ ៥ អ៊ីញមាននូវដង់ស៊ីតេ Pixel ចំនួន ៤៤០ppi
កំឡុងពេលដែលនៅលើអេក្រង់ ៥,៥ អ៊ីញមានចំនួនធ្លាក់នូវត្រឹម
៤០០ppi។
Smartphone display acronyms can be a little
overwhelming, but if you want to know what all the numbers and
abbreviations associated with smartphone screens mean, we've got you
covered. Want to know what each screen type is best for and what the
differences in screen resolution mean? Read on.
I am currently looking for a new professional challenge.
What do you think?
50
50
5739 participants
Resolution
One
major consideration when we talk about smartphone screens can largely
be boiled down to the resolution of the display, and as a rough guide,
larger numbers are better here. Encompassed within this 'resolution'
category is the size of the screen (in inches), the number of pixels
(how much information it can show) and how densely those pixels are
packed, referred to as Pixels Per Inch (ppi)
If you know the size
of the display, you can work out how many pixels are squeezed into one
square inch: that's the pixels per inch (ppi) figure, which is referred
to as pixel density. You can easily calculate your phone's ppi using a pixel density calculator.
We've
got the major bases covered below, but will start with HD resolution or
higher as that's what most smartphones ship with now. You might also
want to pay attention to the stated 'nits' too, which is a rating of
brightness for displays.
HD
HD stands for high definition. HD simply means a
pixel measurement of 1280 x 720 pixels. No matter how large the screen
is, as long as the pixel measurement remains at this measurement, it's
an HD display.
As you can probably tell, the smaller the HD screen
the higher the pixel density and, theoretically, the better the
picture. So simply having an HD display doesn't mean much, as it will
produce a very different image on a 5-inch screen form a 10-inch screen
(note: screen sizes are measured on the diagonal to take account of
slightly different aspect ratios).
Full HD is the next step up and is currently
the standard for smartphone display definition, although 2K (QHD) has
been gaining traction on high-end devices since the Oppo Find 7 and LG G3, the first commercially available devices to have QHD screens.
QHD stands for Quad HD, which is
four times the definition of standard HD. That means you can fit the
same number of pixels as four HD displays into a QHD display of the same
size. The pixel measurement for QHD is 2560 x 1440 pixels. A 5.5-inch
QHD display has a pixel density of 538 ppi. For comparison, the pixel
density of a 5.5-inch Full HD screen is 400 ppi.
Definitions are
also often referred to by the smaller number of the pixel measurement,
so HD will sometimes be called 720p, Full HD gets called 1080p and so
on. With QHD though, the 2K name comes from the fact that the bigger of
the pixel measurements is over 2000 pixels, which can admittedly be a
bit confusing (and really ought to be referred to as 2.5K, if we were
being entirely accurate).
Many current phones from Samsung, Motorola, Huawei and other big name handset makers include 2K displays now as standard.
You can probably see where this is
going. Like 2K, the 4K name comes from the larger of the two pixel
measurements, which are, technically speaking, 4096 pixels in 4K and
only 3840 pixels in Ultra HD. So while these two terms are often used
interchangeably, they are actually a little bit different.
Ultra
HD is 3860 x 2160 pixels and 4K is 4096 x 2160. Both definitions
frequently get shortened to 2160p and the pixel difference is relatively
marginal, but there is a difference. One of the first handsets to
launch with a '4k' display was Sony's Xperia Z5 Premium, which offered Ultra HD resolution on a 5.5-inch screen.
While smartphone screens keep
getting bigger, there hasn't been the race to 4K from handset makers
that we might have expected a year ago. As it stands, pretty much only
Sony's Z5 Premium is still the only one available.
Instead,
what has become the norm at the top of the market is a 2K panel, rather
than a higher resolution option. This, among other reasons, probably
has a lot to do with concerns about power, as larger, higher-resolution
displays demand ever more. With smartphone battery life already a sore
topic for many, handset makers seem reluctant to make that leap just
yet.
However, 2017 could well be the year that we'll see more Ultra HD-equipped handsets going on sale.
Panel types
There
are many display types used in smartphones: LCD, OLED, AMOLED, Super
AMOLED, TFT, IPS and a few others that are less frequently found on
smartphones nowadays, like TFT-LCD.
LCD means Liquid Crystal Display, and its name
refers to the array of liquid crystals illuminated by a backlight, and
their ubiquity and relatively low-cost makes them a popular choice for
smartphones and many other devices.
LCDs also tend to perform
quite well in direct sunlight, as the entire display is illuminated from
behind, but does suffer from potentially less accurate color
representation than displays that don't require a backlight.
Within smartphones, you have both TFT and IPS
displays. TFT stands for Thin Film Transistor, an advanced version of
LCD that uses an active matrix (like the AM in AMOLED). Active matrix
means that each pixel is attached to a transistor and capacitor
individually.
The main advantage of TFT is its relatively low
production cost and increased contrast when compared to traditional
LCDs. The disadvantage of TFT LCDs is higher energy demands than some
other LCDs and less impressive viewing angles and color reproduction.
Its for these reasons, and falling costs of alternative options, that
TFTs are less regularly used in smartphones now.
IPS stands for
In-Plane Switching and it is a further improvement on TFT LCDs that
delivers better color reproduction and, most notably, improved viewing
angles than TFT-LCDs. It does this by using two transistors for each
pixel combined with a more powerful backlight, but the downside is that
they require more power than other types of non-LCD display. They
generally use less power than a TFT display still though.
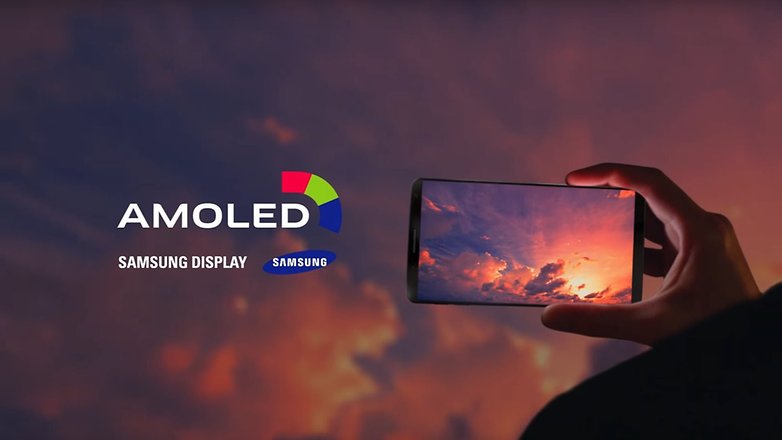
AMOLED stands for Active Matrix Organic
Light-Emitting Diode. While this may sound complicated it actually
isn't. We already encountered the active matrix in TFT LCD technology,
and OLED is simply a term for another thin-film display technology.
OLED
is an organic material that, like the name implies, emits light when a
current is passed through it. As opposed to LCD panels, which are
back-lit, OLED displays are 'always off' unless the individual pixels
are electrified.
This means that OLED displays have much purer
blacks and consume less energy when black or darker colors are displayed
on-screen. However, lighter-colored themes on AMOLED screens use
considerably more power than an LCD using the same theme. OLED screens
are also more expensive to produce than LCD.
Because the black
pixels are 'off' in an OLED display, the contrast ratios are also higher
than LCD screens. AMOLED displays have a very fast refresh rate too,
but on the down side are not quite as visible in direct sunlight as
backlit LCDs. Screen burn-in and diode degradation (because they are
organic) are other factors to consider.
What's the difference between OLED, AMOLED and Super AMOLED
OLED
stands for Organic Light Emitting Diode, and an OLED display is
comprised of thin sheets electroluminescent material, the main benefit
of which is they produce their own light, and so don't require a
backlight, which cuts down on energy requirements. OLED displays are
more commonly referred to as AMOLED displays when used on smartphones or
TVs.
As we've already covered, the AM part of AMOLED stands for
Active Matrix, which is different again from a Passive Matrix OLED
(P-OLED), though these are less common in smartphones.
Retina is another marketing term, this time
from Apple. A Retina display is not defined by a specific
characteristic, other than that it is supposedly of sufficient
resolution that the human eye can't discern pixels at a normal viewing
distance and has a pixel density over 300 ppi. As we already know
though, Apple doesn't measure ppi in the same way as other handset
makers.
This measurement obviously changes depending on the size
and resolution of the display. Apple popularized the Retina concept with
the iPhone 4, which had a 960 x 640 pixel resolution on a 3.5-inch IPS
LCD screen, resulting in 330 pixels per square inch (ppi).
As we have seen, each
term is not restricted to one manufacturer: AMOLED is not always Samsung
and Retina is not always Apple (although no one else uses the term).
iPhone IPS LCD displays are currently manufactured by LG, Samsung has
built displays for the iPad and not all Samsung devices are AMOLED
either. This is not simply a case of which display is better: it's a
trade-off between pros and cons.
The point of all this is
basically to say two things: numbers and technical data are worth
considering when comparing the screens on two smartphones, but the
real-world performance of these displays is more important. It's
impossible to gauge a display on paper, but you really need to see it in
real life to know if it is too cool or warm for you, whether you like
its saturation, brightness or contrast levels, what its viewing angles
are like, and so on.
Lastly, be aware of your usage habits and
select a display accordingly: if you are a couch potato by night and are
desk-bound all day, then the daylight viewing benefits of LCDs are
probably not so important to you. If you're an outdoors type, then maybe
they are.
If you're crazy about squeezing every drop of life out
of your battery or are simply obsessed with eye-popping color and
contrast, then take a look at AMOLED.
Do you have a favorite type
of display? Have you noticed the difference between the different types
of display available? Let us know in the comments below!